Product Photography Process
Potential clients of mine are usually very curious about the product photography process. In this article Ill help demystify the issue.
It always helps me when my clients have an idea of what they want their product to look like after the process. If you haven’t given the idea much thought there are tons of image based libraries like Pinterest or google image search that can help you find some images you like. Once you have some ideas please send them over. I’m always open to creative input. Once I have your product in hand at the studio the next phase of the process begins.
This next phase of the process involves figuring out a good lighting and composition. I will experiment with different angles and lighting scenarios until I have some samples I am happy with. Once I have some good samples captured I send over proofs. Its important to understand that these images are still in raw form. Raw images wont be as vibrant or pop as much as the final image. They are merely there to give my clients an opportunity to preview what the final image will look like. After I deliver my initial proofs and receive feedback I either reshoot or move forward with the process.
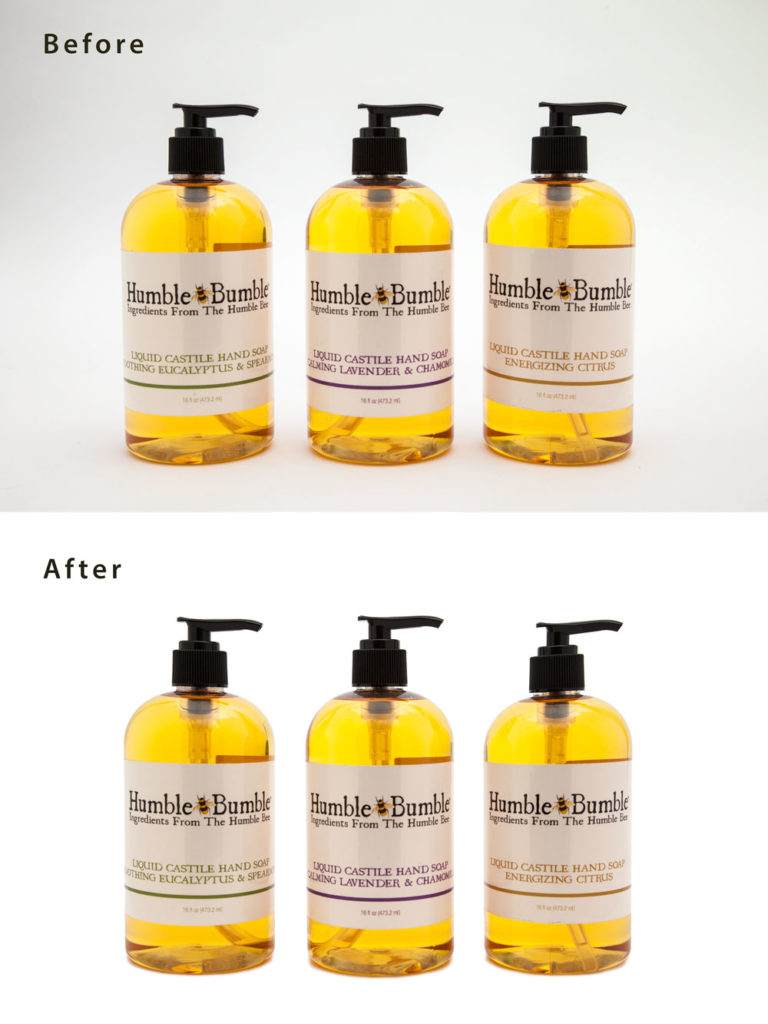
The final process involves retouching and cropping. This is where Photoshop gets involved. I remove any blemishes dirt or imperfections from the images until they are perfect. This is also the phase where I will remove any background information from the pictures. Since most of my business is product photography on white its crucial to the final product. I’ve laid out a before and after image below for a better understanding the process.

Comments are closed here.